Getting Started
This article will go through the minimum requirements to get your organisation set up to start accepting payments.
After logging into your account you will see the below dashboard.

2. From the dashboard select Create to start creating a product(s). Read about the differences between products here to help you choose a product that suits best.
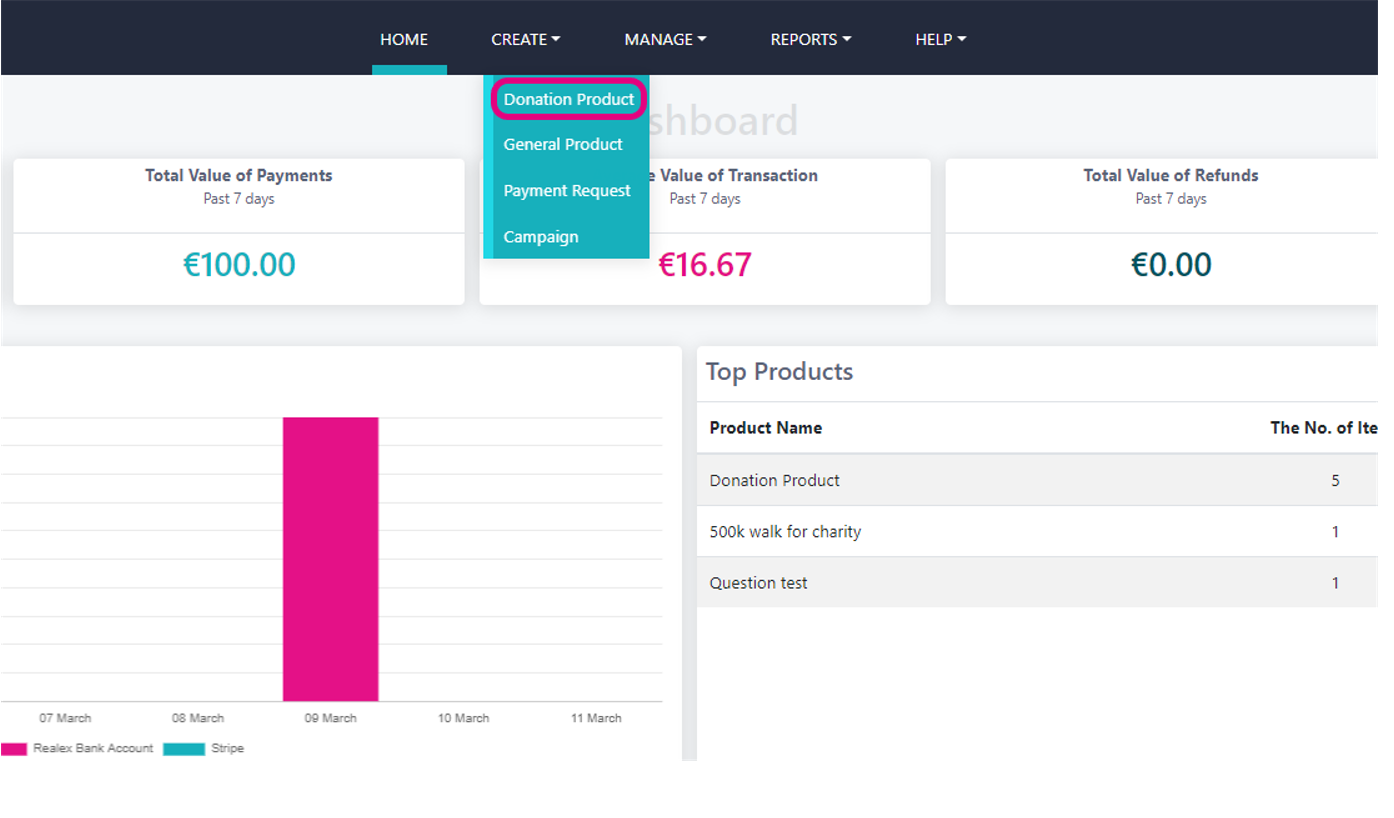
3. For the purpose of this article we will use the Donation Product as an example. Add in the name of the product you wish to create in the Donation Title field. Select the Bank Account that you want the funds to go into.
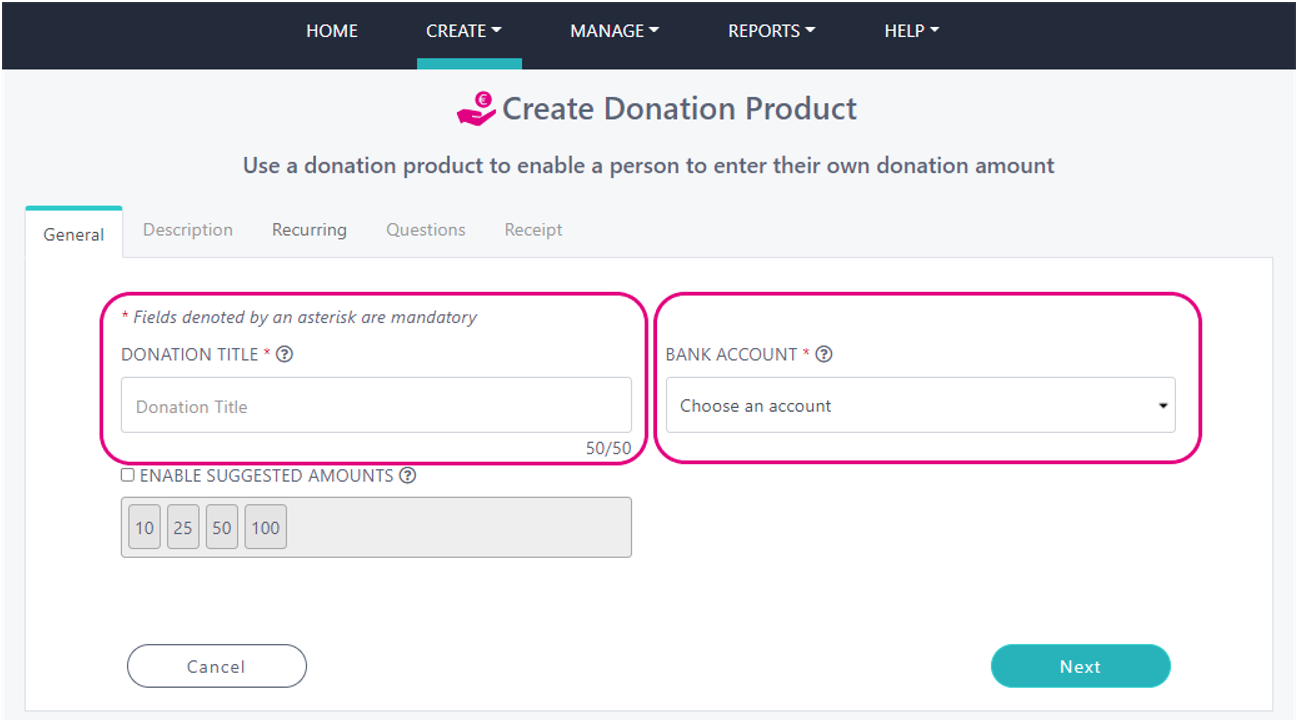
These are the only mandatory fields in creating a product, you can click Next until you reach the end of the setup, then Save and Publish. You now have a live product and can start accepting payments. Find more information here on how you can enhance your product.
4. After creating your product, now create a button for your website so your clients can access your product(s). From the settings option on the dashboard, select Button Creation.
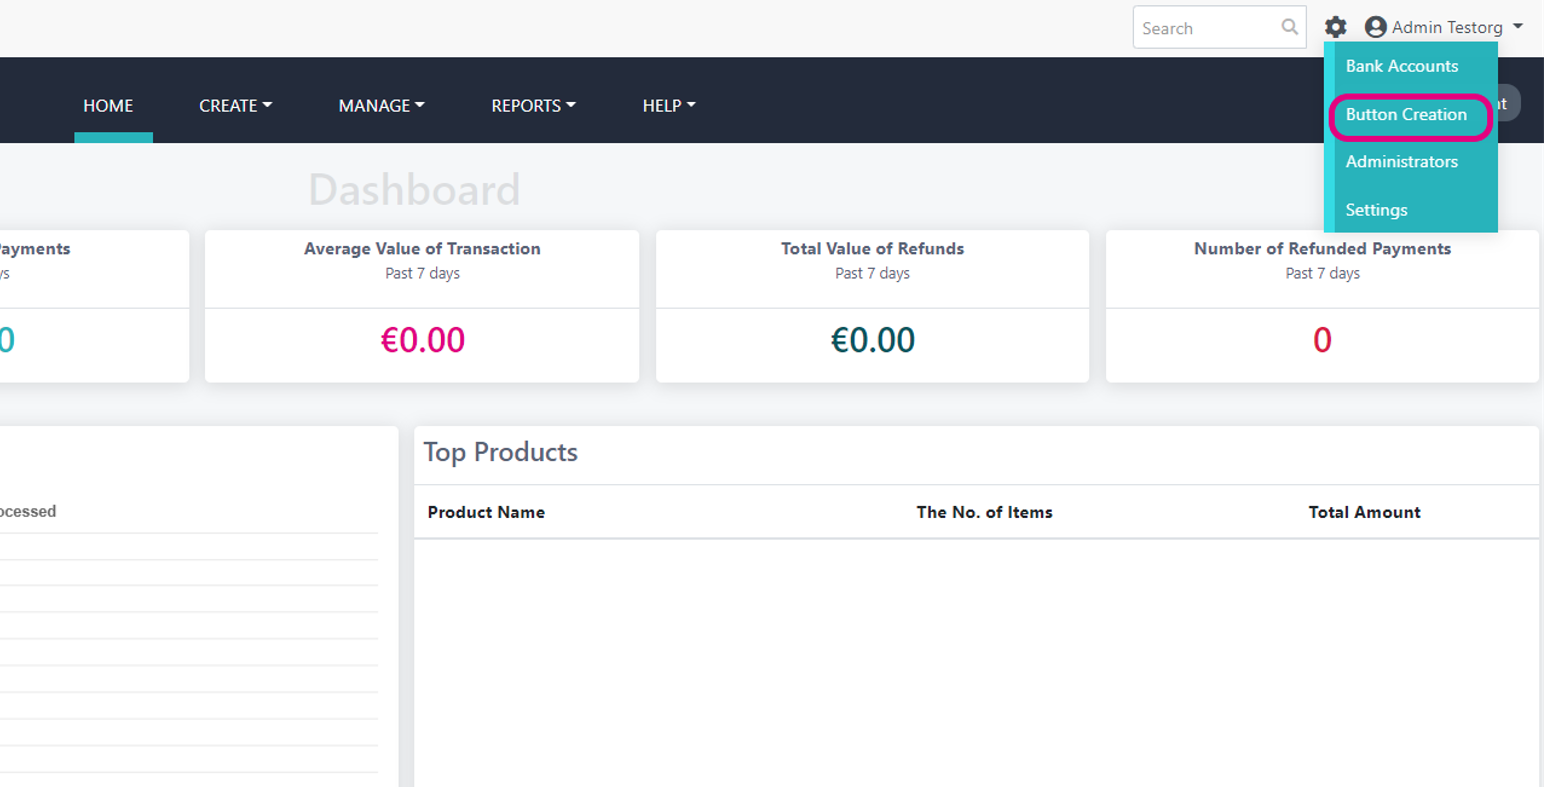
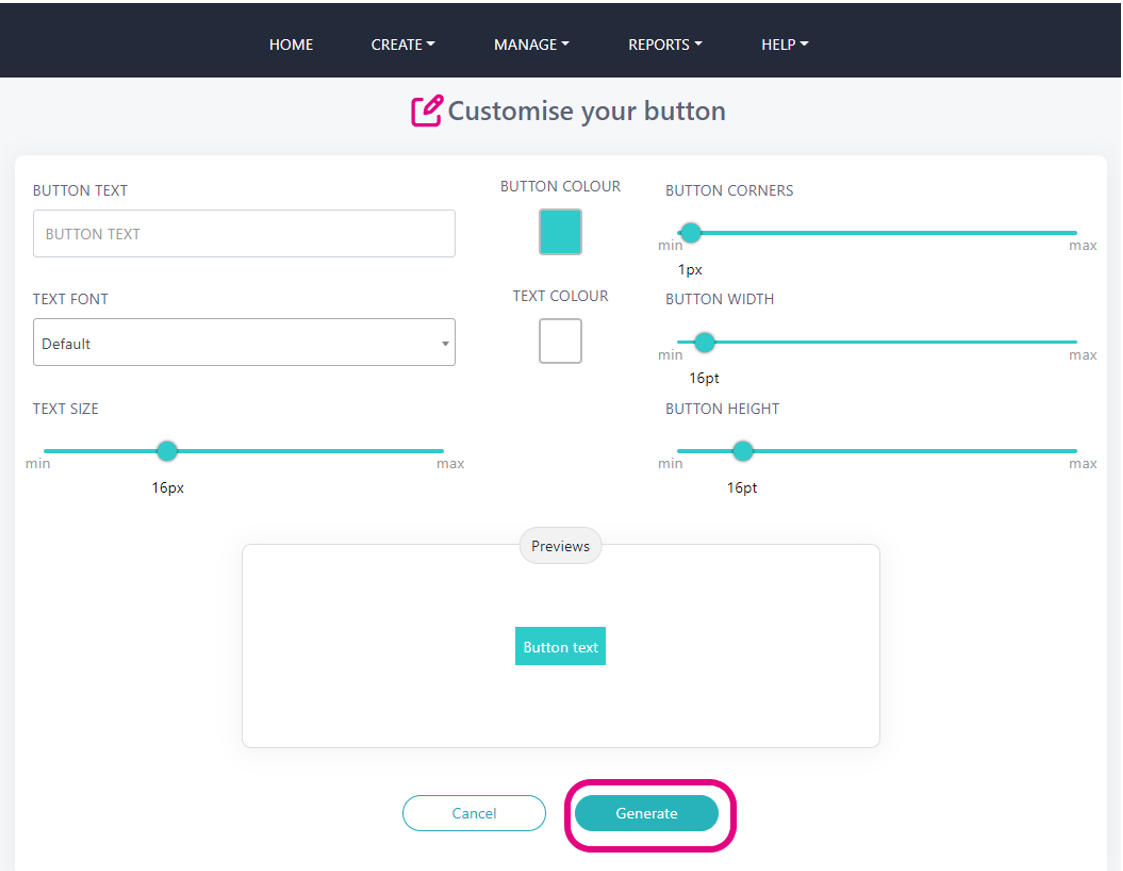
Create the button you want by filling out the fields and using the sliders, a preview will appear in the box as you are customizing your button. Once you are finished click Generate.
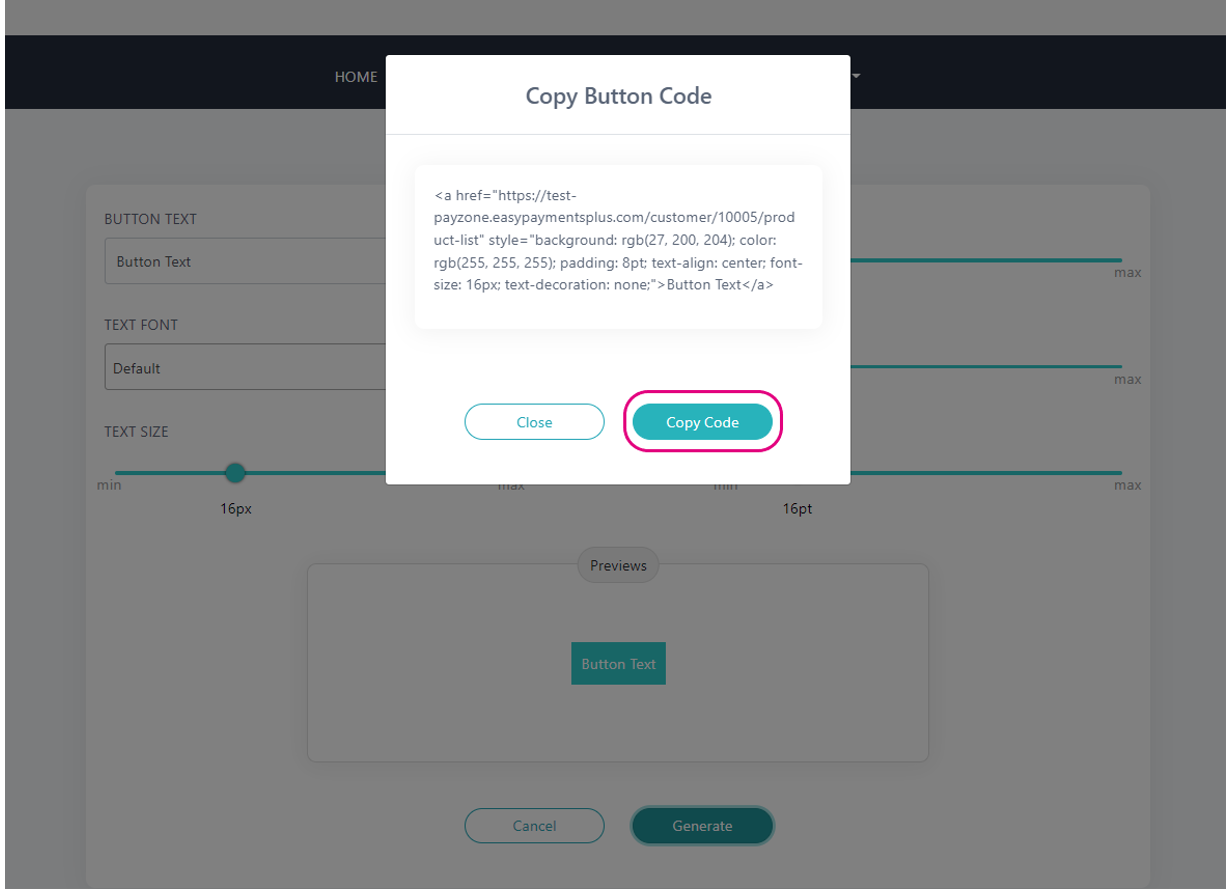
You can then copy the code into the HTML part of your website.
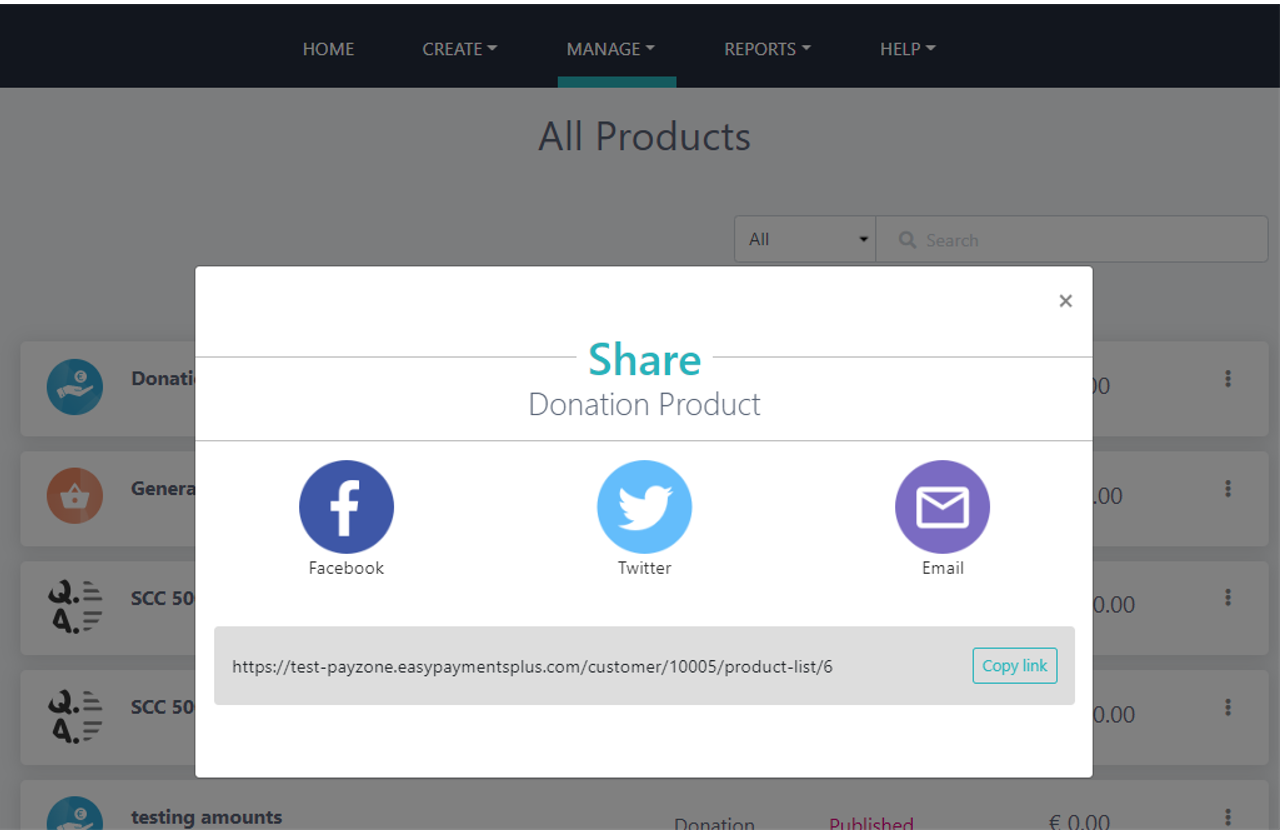
5. Share your product on social media or via email.
If you don’t have a website and just want to share the product through email, WhatsApp or through social media follow the below steps.
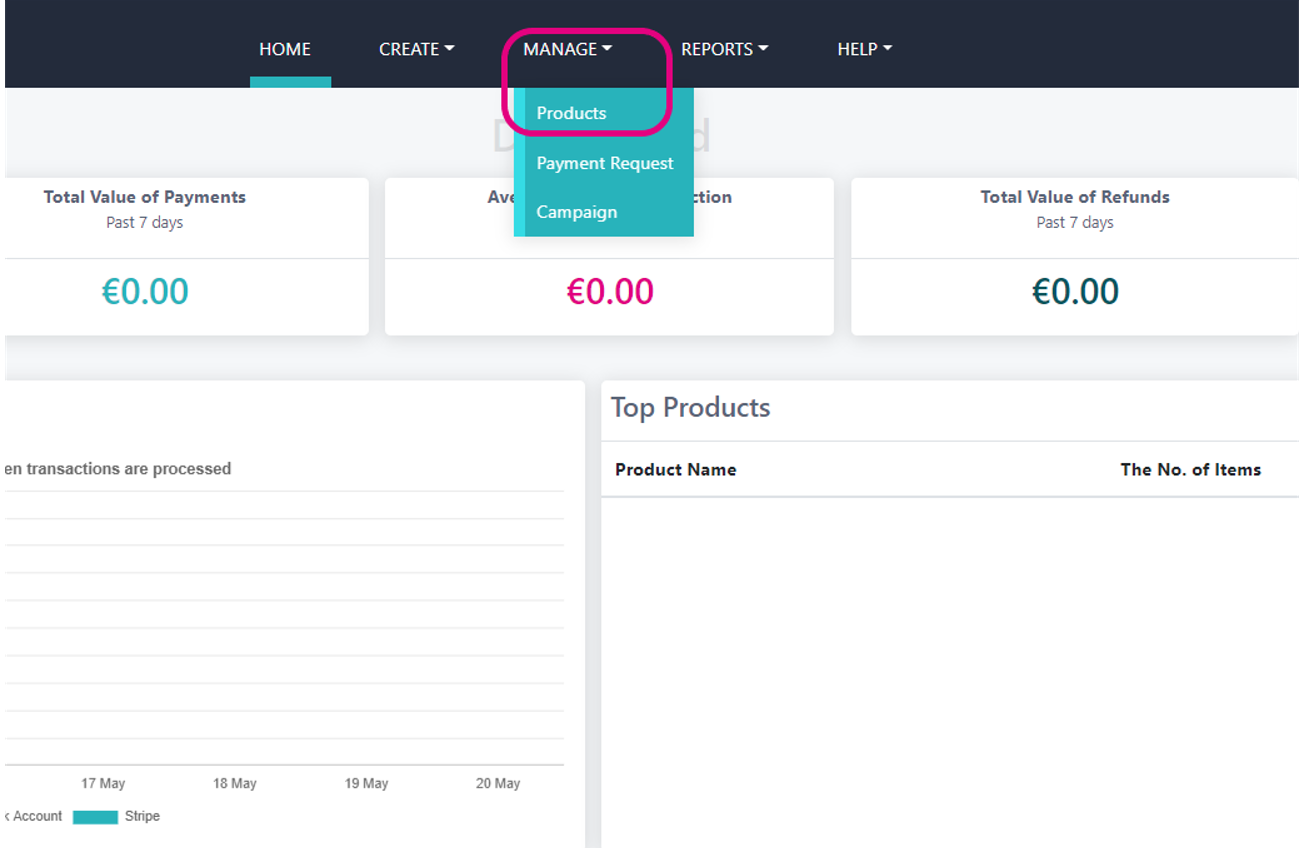
Select Manage from your dashboard and then Products. Select the 3 dots from the product you wish to share.
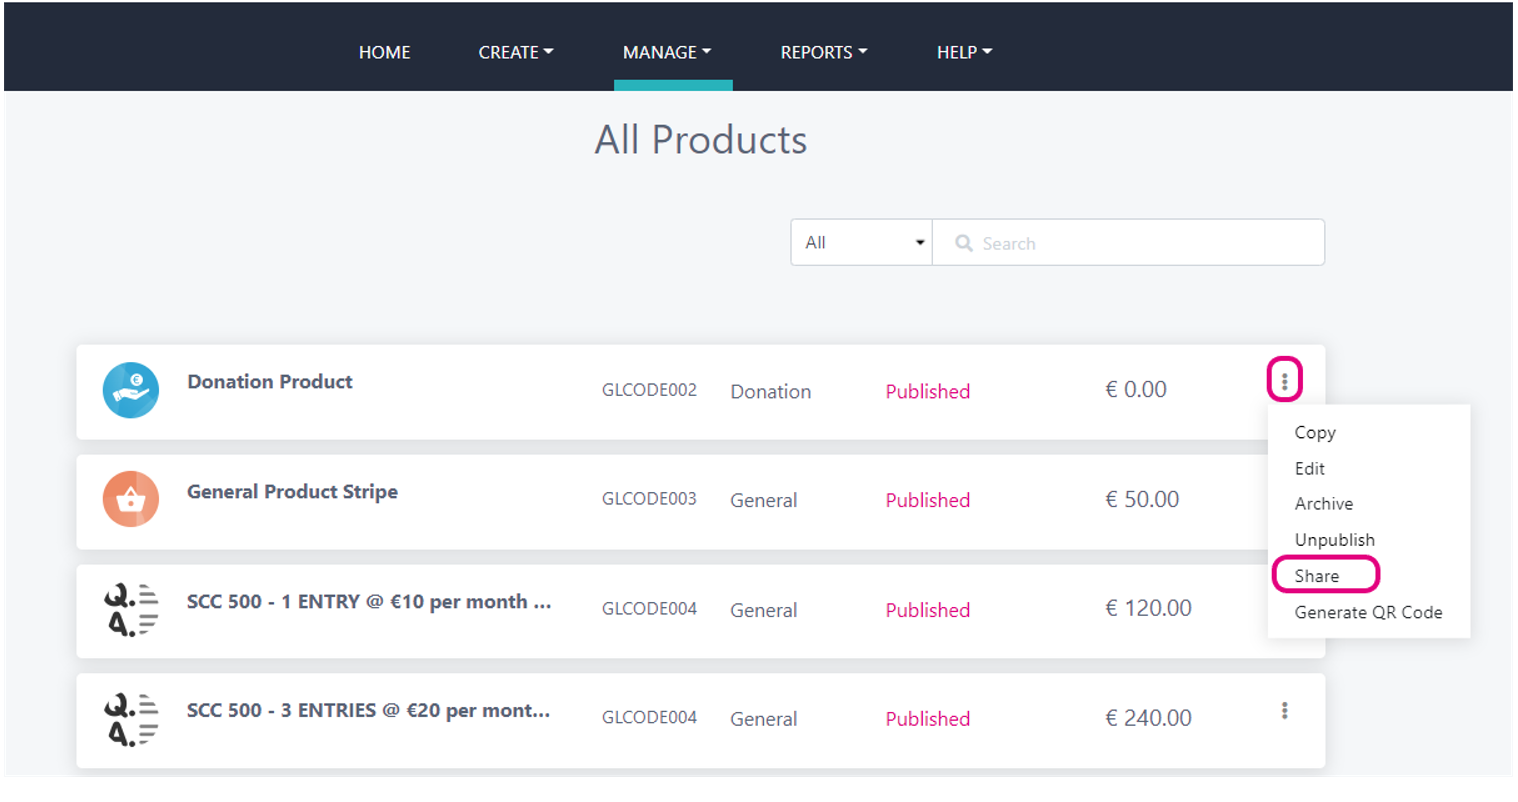
Use the quick share buttons to share to Facebook, Twitter & Email. Or Copy Link to share to WhatsApp or text message.