Creating an Event
This article outlines how you can create an event. You can add different ticket types, set an event start date/time & end date/time and much more.
Follow these steps
From your dashboard, select Create → Event.
From the General Tab you can do the following:
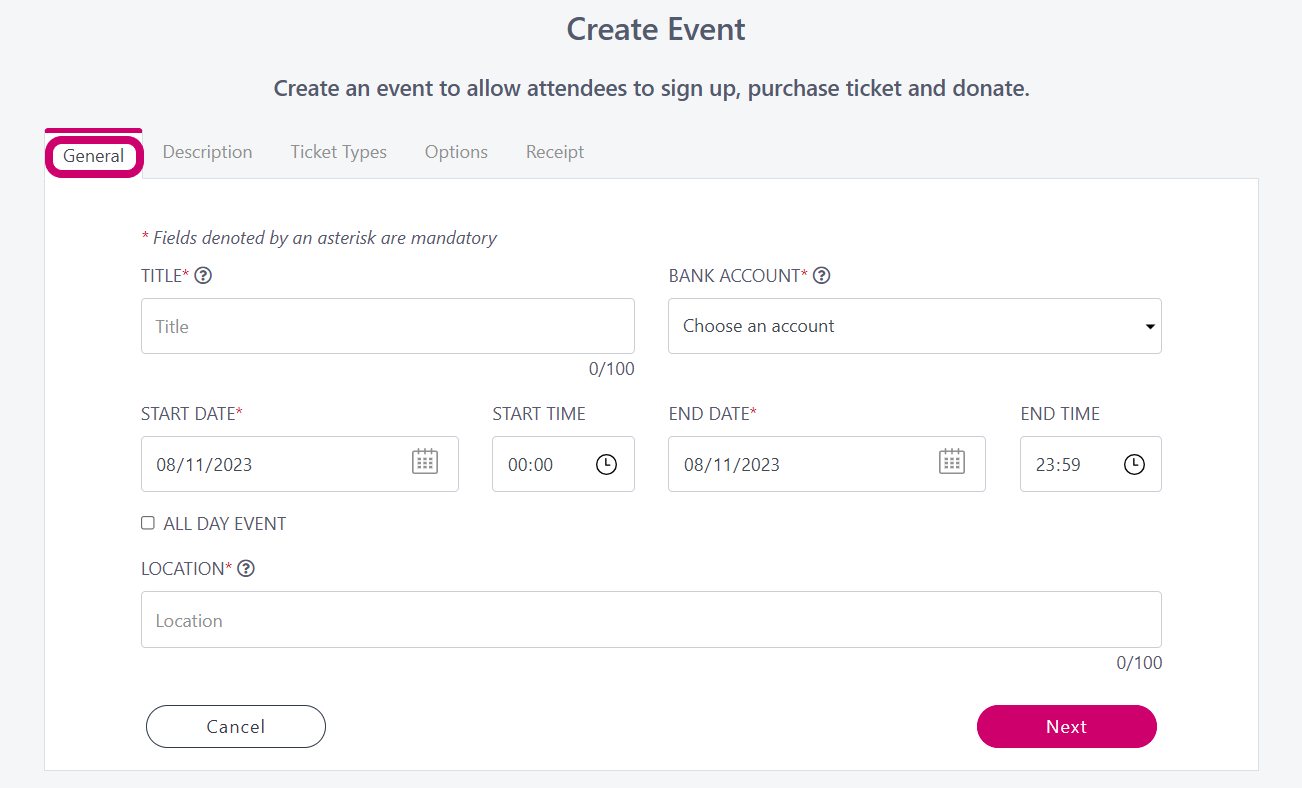
Title - Give your an event a name that will be displayed to potential attendees.
Bank Account - Select the bank account which you want funds from the event to settle into.
Start Date & Start Time - Set a date & time in which the event will commence.
End Date & End Time - Set a date & time in which the event will conclude.
All Day Event - Check this box if it is an all day event and the the start time & end time will not display.
Location - Enter in the location in which thew event will take place.
From the Description Tab you can do the following:
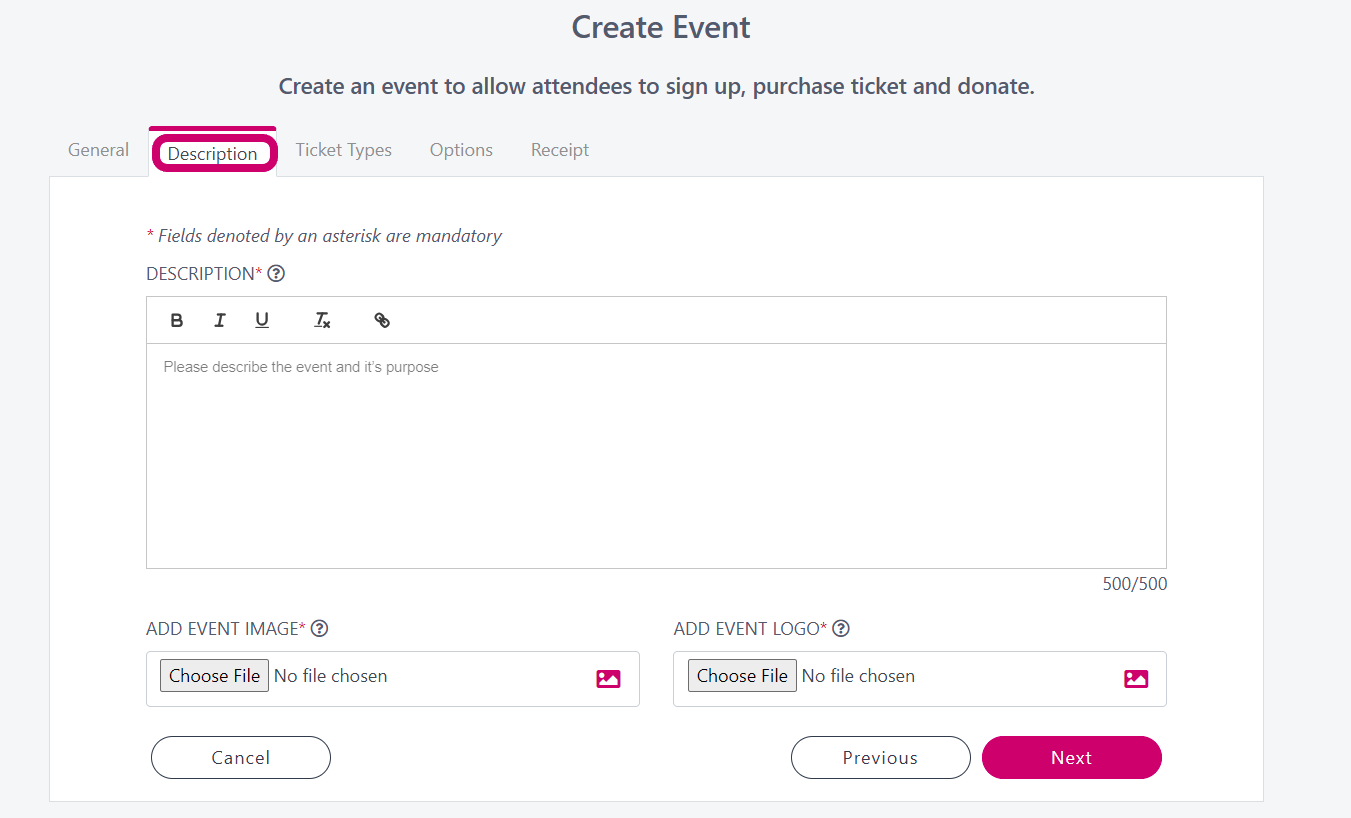
Description - Use this field to describe the event to potential attendees.
To add a link to your event description, type in the the test you want into the description, then highlight the word you want to attach the URL too and click on the link symbol.
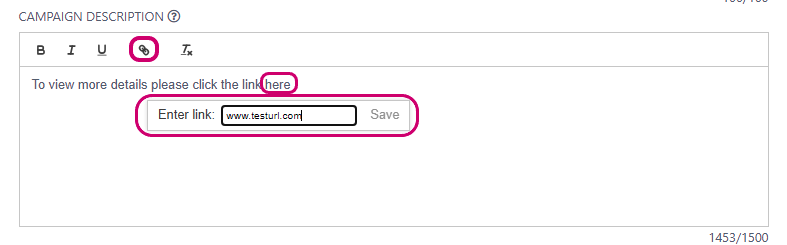
Then you enter in the URL into the ‘Enter link’ box and press 'Save'.
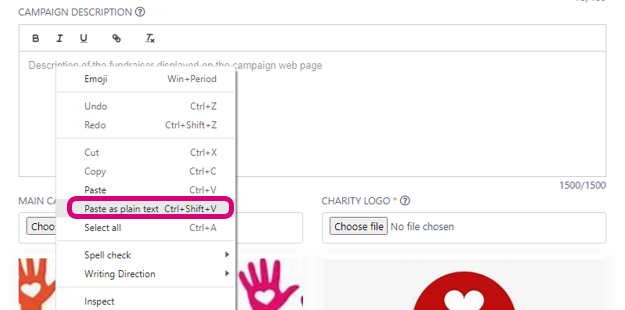
If you have copied text from a website and are trying to paste it into the description section. You may receive the following error message ‘Please remove the HTML tags you have added.’ If you do, when pasting text into the description box, use the ‘Paste as plain text option’.
GL Code - Add a general code to the event if applicable to you.
Event Image - Add an image to your event landing page. Use the tooltip
 to see the recommended image size.
Event Logo - Add in a logo that will be displayed on your event landing page. This could be a charity logo or your organisation logo as an example.
From the Ticket Types you can do the following:
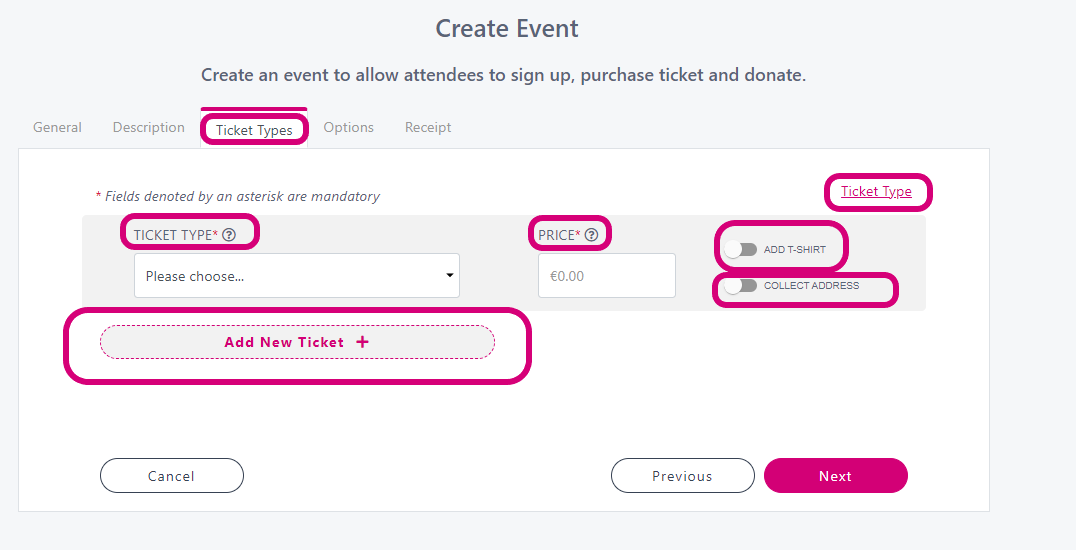
Ticket Type - Use the ticket type dropdown list to select the type of tickets you want to sell for your event. The ticket types available are:
Adult
Student
Child
Senior Citizen
Price - Set a price for each ticket type you wish to sell for your event.
Add T-Shirt - Switch this option on/off depending on if you wish to collect this information from the attendee. Please note:
The attendee will get to choose from the following options when selecting a t-shirt: No Thank You, Small, Medium, Large & X Large.
Collect Address - Switch this option on/off depending on if you wish to collect the attendees address.
Add New Ticket - Click here to add additional ticket types.
Click on the Ticket Type hyperlink on the top right of the screen to see what information is requested from each of the ticket type attendees when they are registering.
From the Options tab you can do the following:
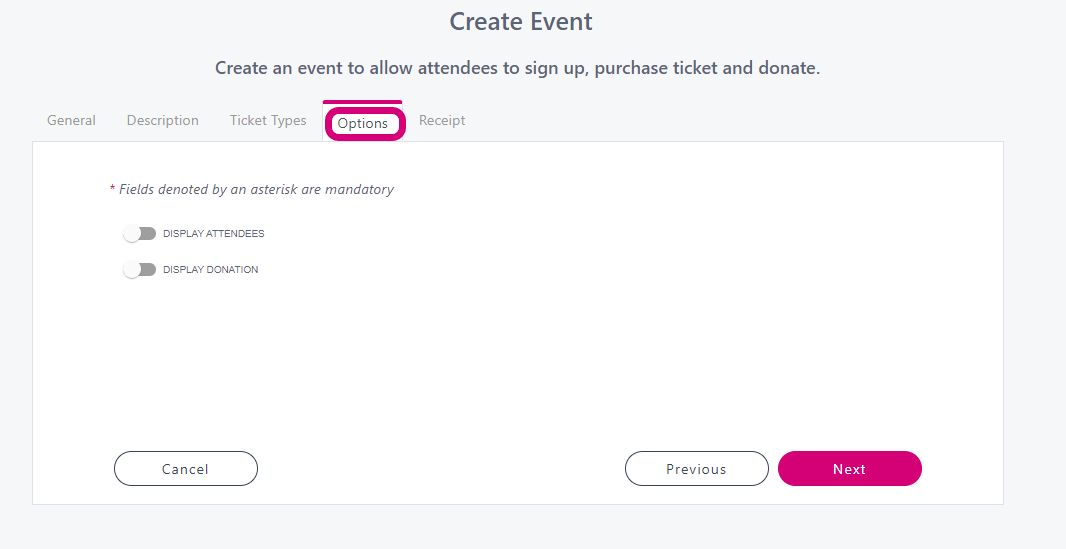
Display Attendees - Switch this on to publicly show the amount of people who have registered for the event. This will show a total number of people attending the event.
Display Donation - Switch this on to show a donation button on the event landing page, this give the option for people to donate to the cause even if they won’t be able to take part in the event.
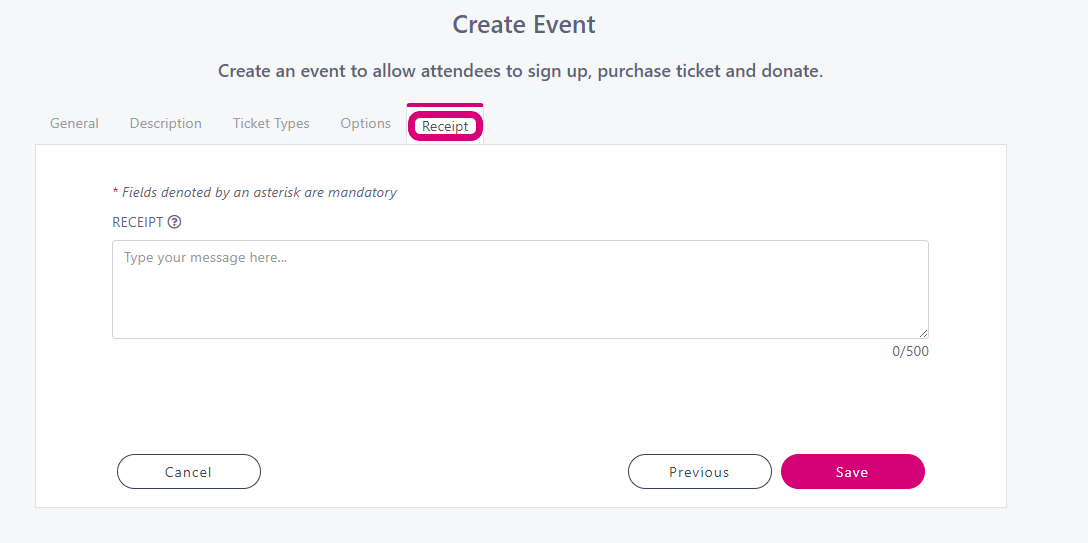
On the Receipt tab you can enter in a message that will be sent with each receipt of payment. Please Note: People will have the option to donate to your event/charity and not attend your event, if they donate they will see the same message you input here.
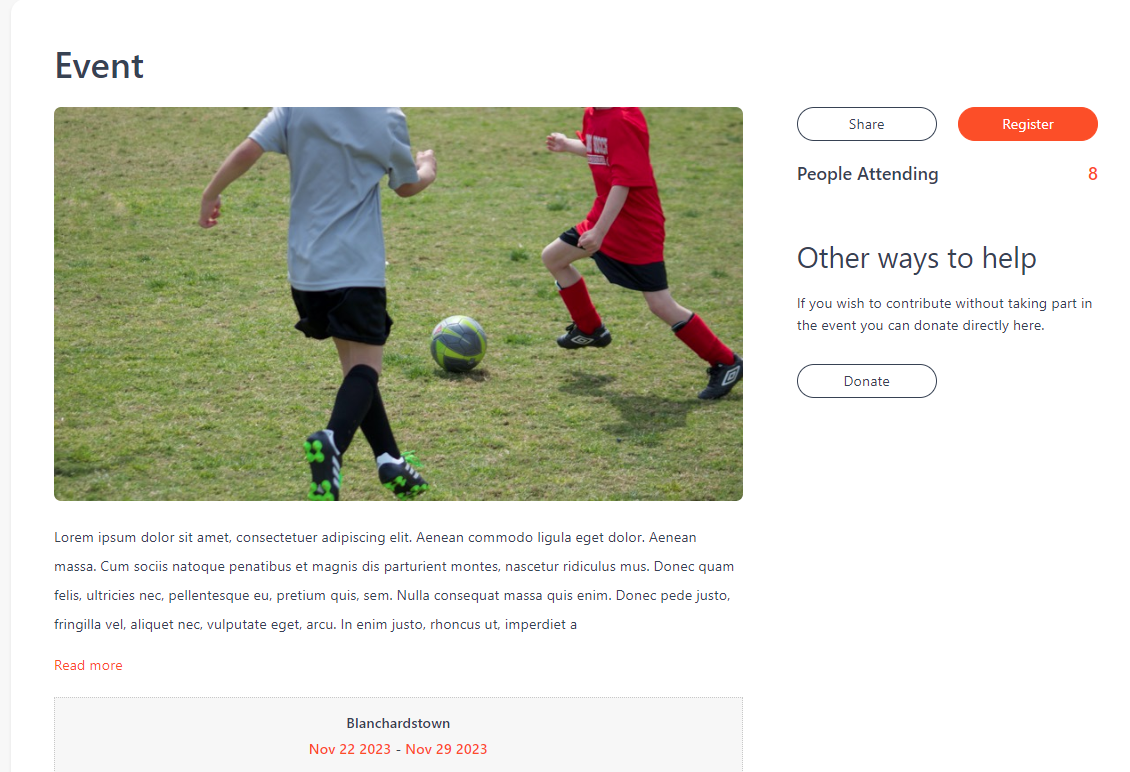
Here is an example of what your event could potentially look like