Adding an Administrator with Restricted Access
This article explains how to add an administrator to the system and assign specific products to them. Once assigned, the administrator will have access to all payment information related to those products.
From the setting icon next to your name on the dashboard, click Administrators.
Click ‘Add Administrator’.
Enter the administrators contact details and from the ‘Admin Type’ dropdown list, select ‘Restricted’.
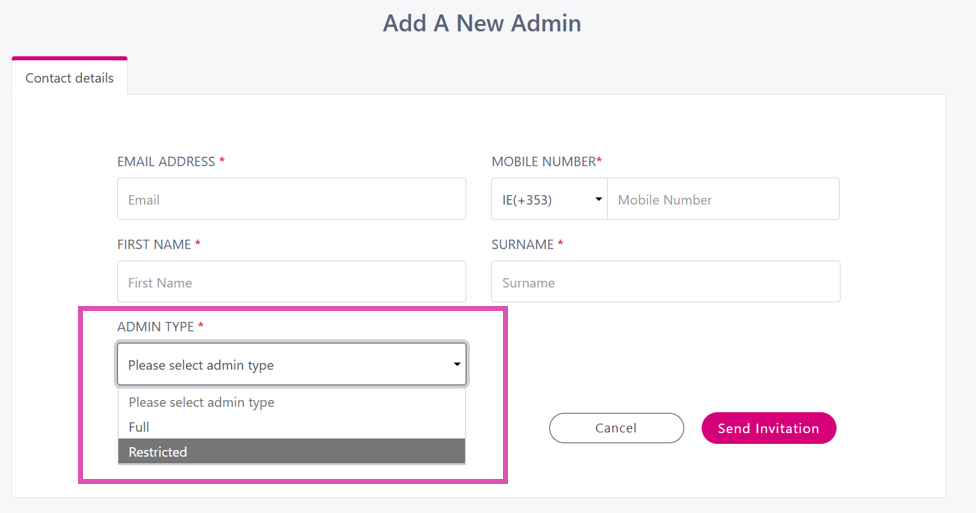
And then click ‘Send Invitation’.
You will be prompted to enter in your own password to proceed.
You will then see the below message:
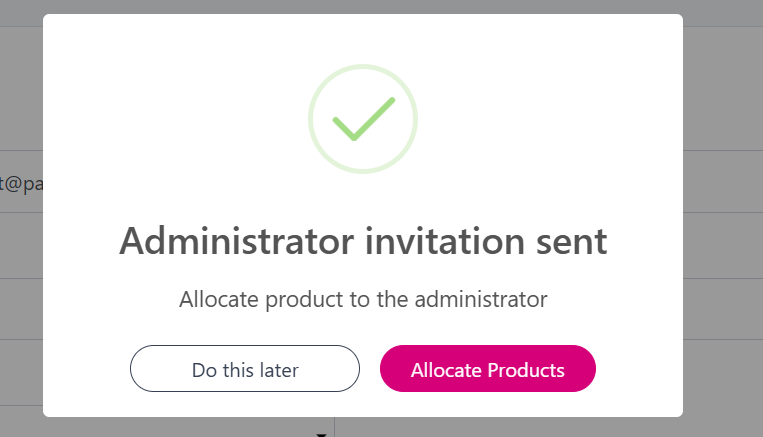
To allocate products to the newly added restricted admin, click ‘Allocate Products’.
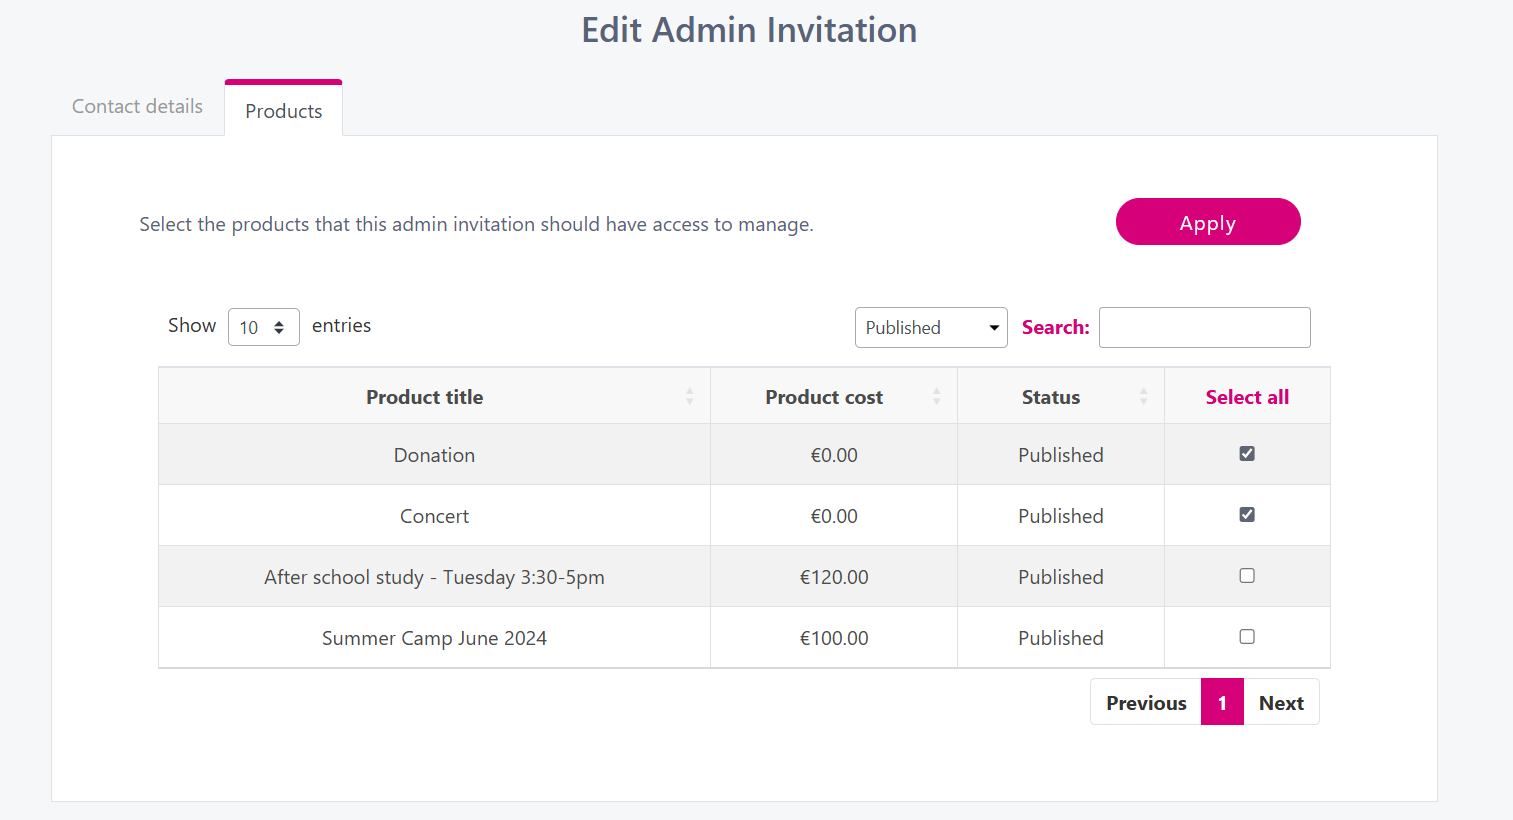
You will be brought to the below screen, where you can click on the products you wish to allocate to the newly added admin. Tick the ones you want to assign and then click ‘Apply’.
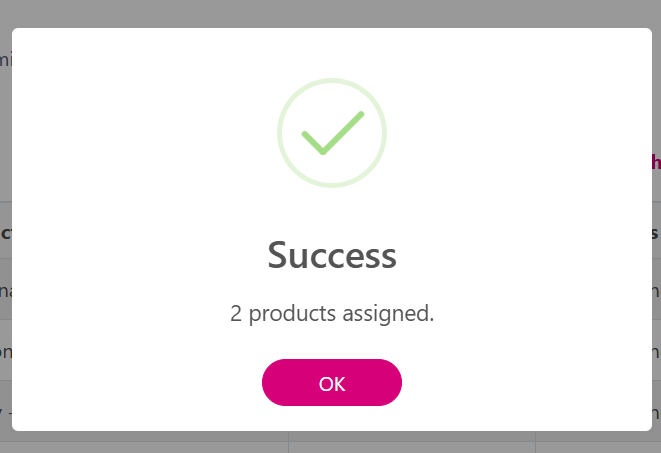
You will see a Success message like below if the products have been successfully assigned.
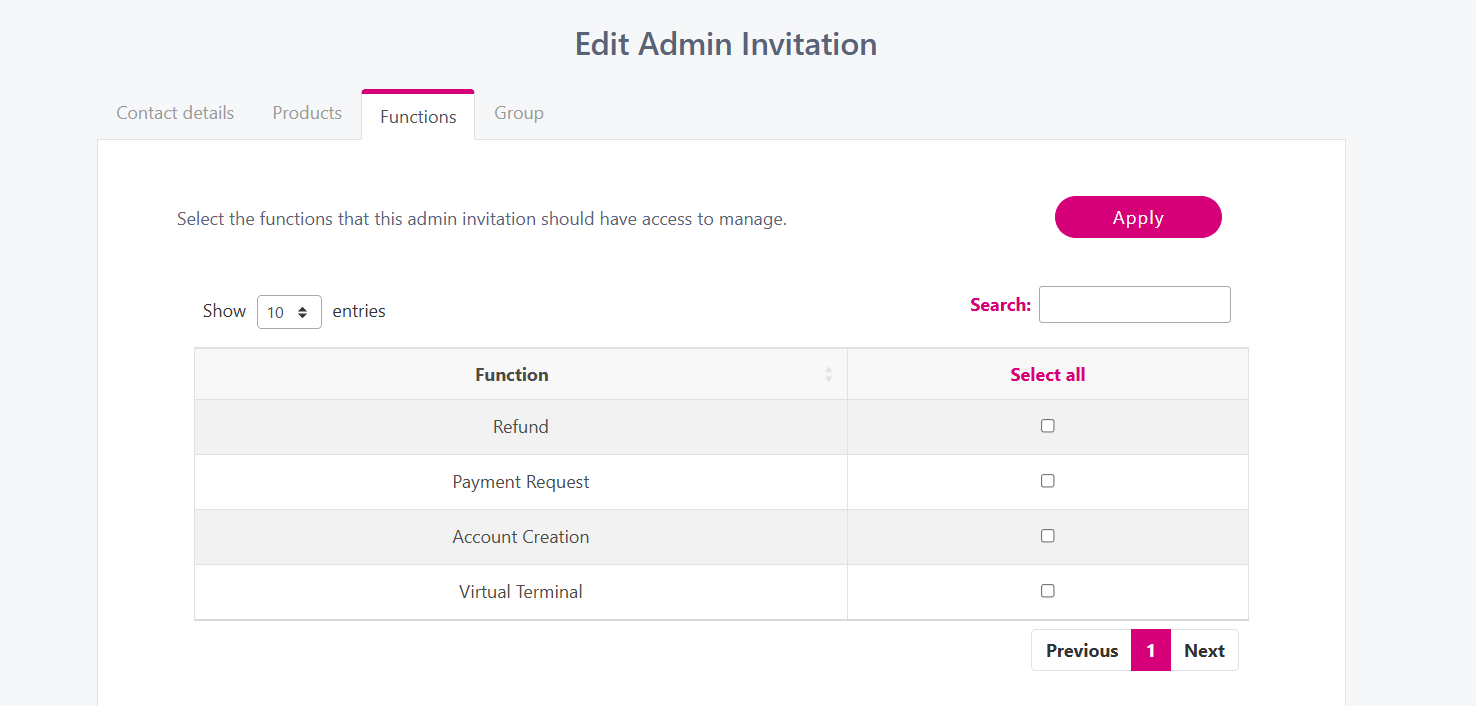
You can also allocate certain Functions to the restricted admin. By selecting a function and clicking ‘Apply’, you are giving the restricted admin access to carry out these functions.
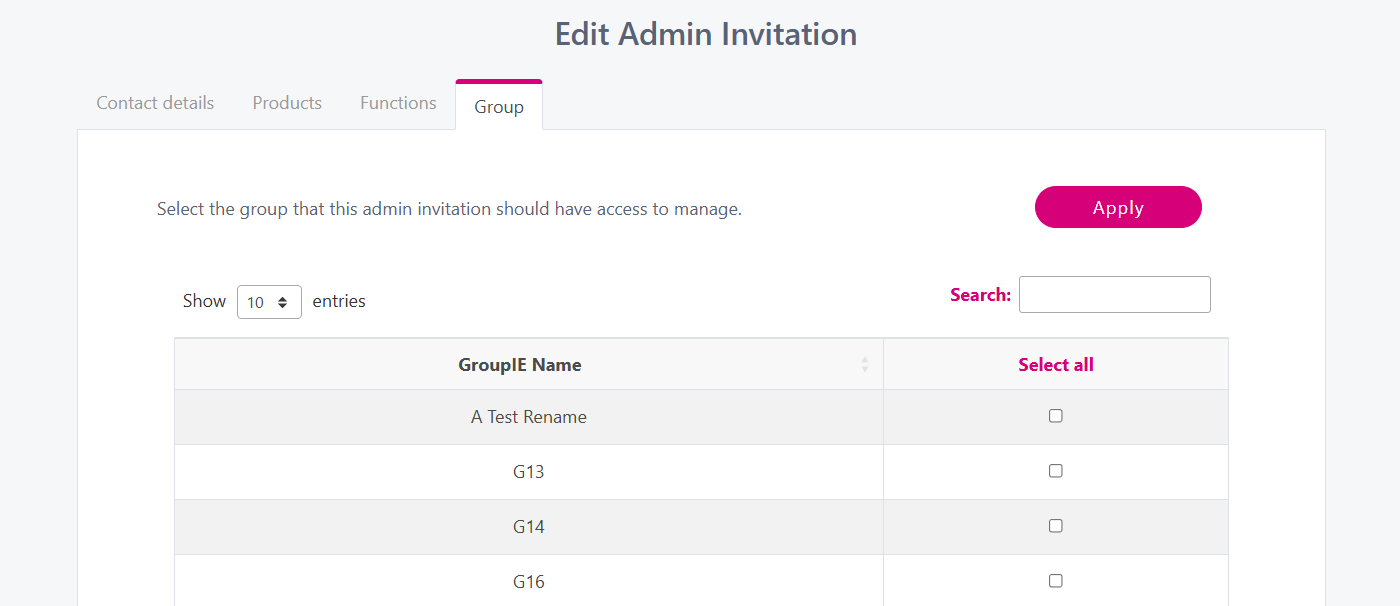
To limit what a restricted admin can access, assign specific groups to their profile. They will only be able to view payments and member data for the groups you select. Choose the relevant groups and click ‘Apply’ to save the changes. This is only applicable if you organisation has groups switch on.
To edit the products you have assigned at a later time, you can follow Step 1 to access the list of Administrators. Then click on the 3 dots, and select Restrictions.