Event
This article will go through the management of events. Viewing Payments, attendees, sharing and much more.
Follow these steps
From your dashboard, select Manage → Event.
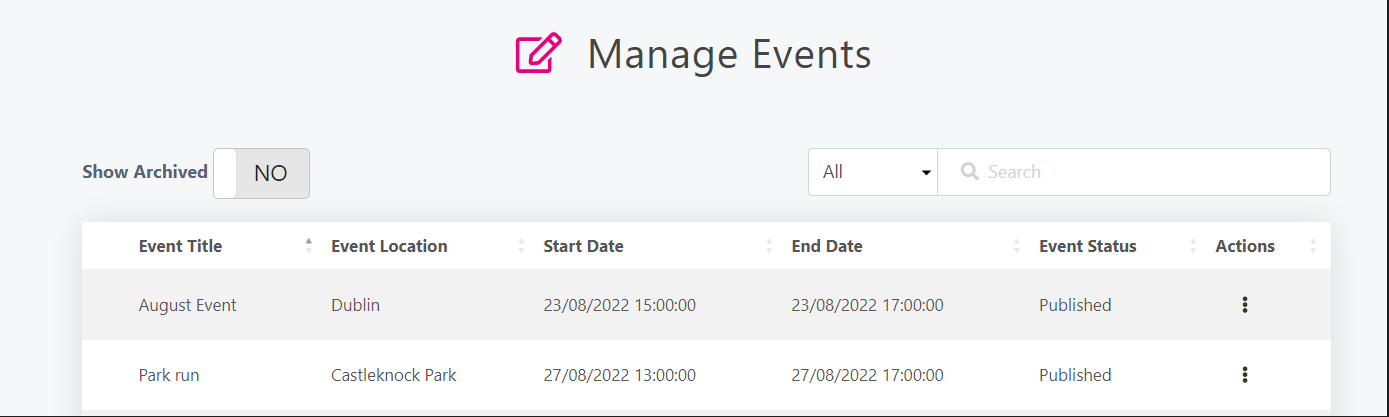
You will see the below screen, with all the events you have created. Click the Show Archived to yes to show any events that you have previously archived.
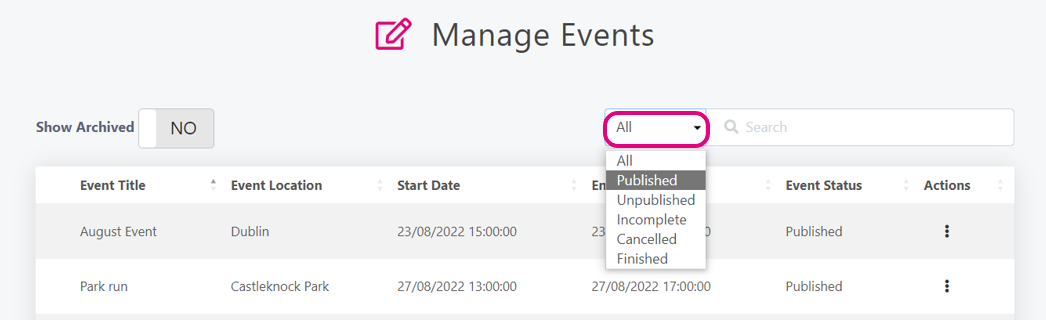
Use the All dropdown list to filter by event status.
Click on the 3 dots beside any event to see your manage options.
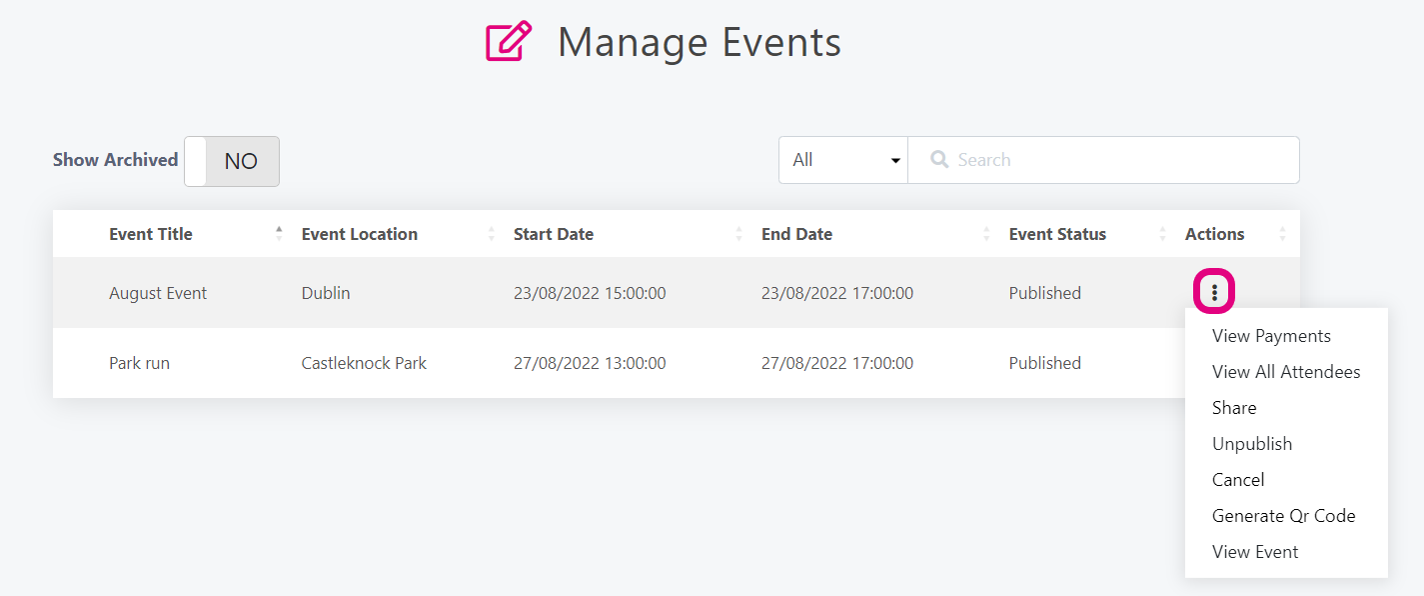
View Payments - View all payments made against your event, this will include payments for tickets and any donations made.
View All Attendees - View all attendees that have registered for your event. You will see any detail that they have filled out also, i.e. email, t-shirt size, age & gender.
Share - Use this option to share straight to Twitter, Facebook or email. You can also copy the link to the event and share on other social media (WhatsApp, Instagram) or via SMS.
Unpublish - You will only see this if your event has a status of Published. By unpublishing your event, your event will no longer be visible to any potential attendees.
Cancel - If you need to cancel your event use this option, you will be prompted to fill out a reason for cancelling. This means if any potential attendees click on the event link that they may have, they will see that the event has been cancelled and the reason why.
Generate Qr Code - Use this option to download a QR Code to include on any posters, flyers etc. Once the potential attendee scans the Qr Code they will be brought to the event landing page where they can register for the event or donate.
View Event - Use this button to be brought straight to your campaign landing page.
Other options that you may see when clicking on the 3 dots include:
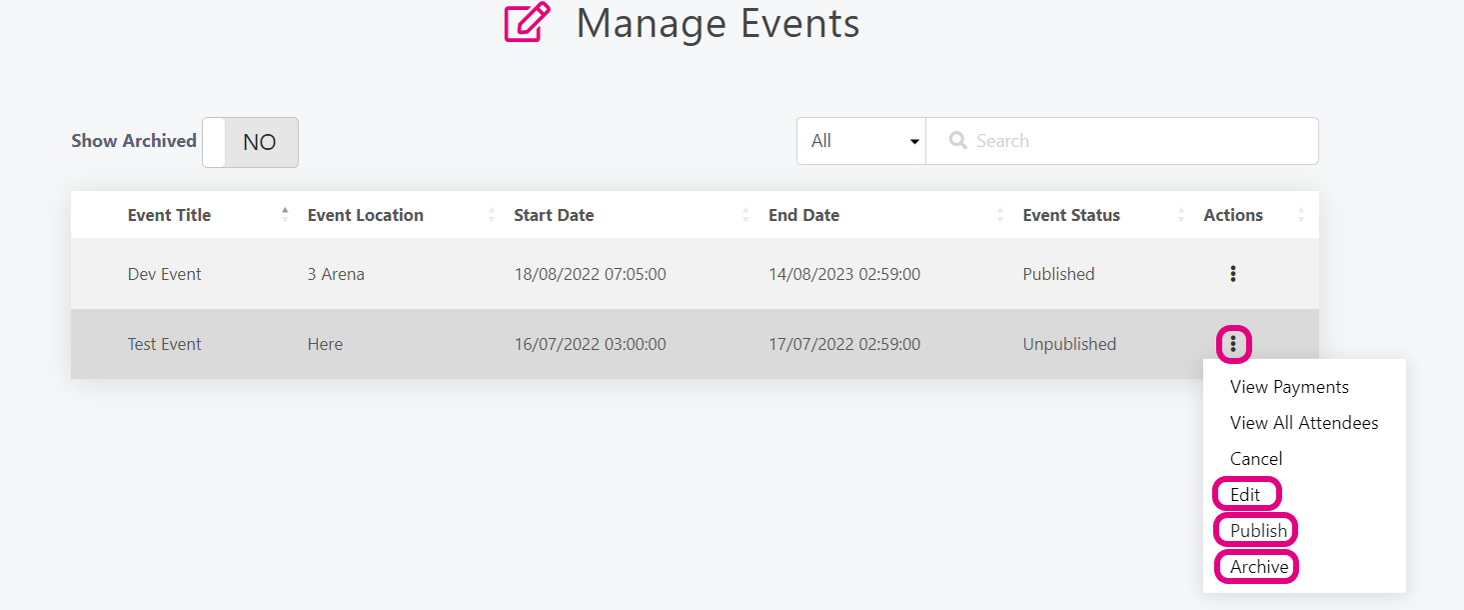
Edit - You will only see this option when an event has a status of Unpublished or Incomplete. If you wish to edit any event you will need to unplublish the event first.
Archive - You will only see this option when an event is Unpublished. Use this option to move this event to the archived section. You can always view this again by moving the Show Archived button to YES.
Publish - Use this option to make an event public.
Finish - You will see this option when an event is still Published but has reached its end date. Use this option to give your event a status of finished. Once an event has been marked as finished, you will only have the option to view all payments, view all attendees or archive it.